The Smart Search in MiMembership provides the user the option to create customised reports and search lists for data export by selection of specific output and criteria options available from within the database.
Output options include:
| Members | Invoices | Payments | Statements |
| Payment Plans | Memberships | POS Transactions | Member Notes |
| Payment Plan Instalments | Accounts | Facility Access | Email History |
| Relationships | Quotes | Direct Debit Agreements | Member Draw History |
| Member Timeline | External Transactions | Form Submissions |
Quick Guide
- Select Smart Search from main menu
- Choose the search Output from available options
- Click the Next: Build Criteria button
- Select your search Criteria from each of the Search Field menu option
- Click the +Criteria button button
- Repeat steps 4 and 5 until all criteria options for the smart search have been added
- Click the Next: Preview Results button. From the results preview page you can:
- Use the Action button to Edit or Save the Smart Search
- Use the Bulk Action button to Export the search results to csv, send an Email or action one the other bulk action menu options
Step by Step Guide
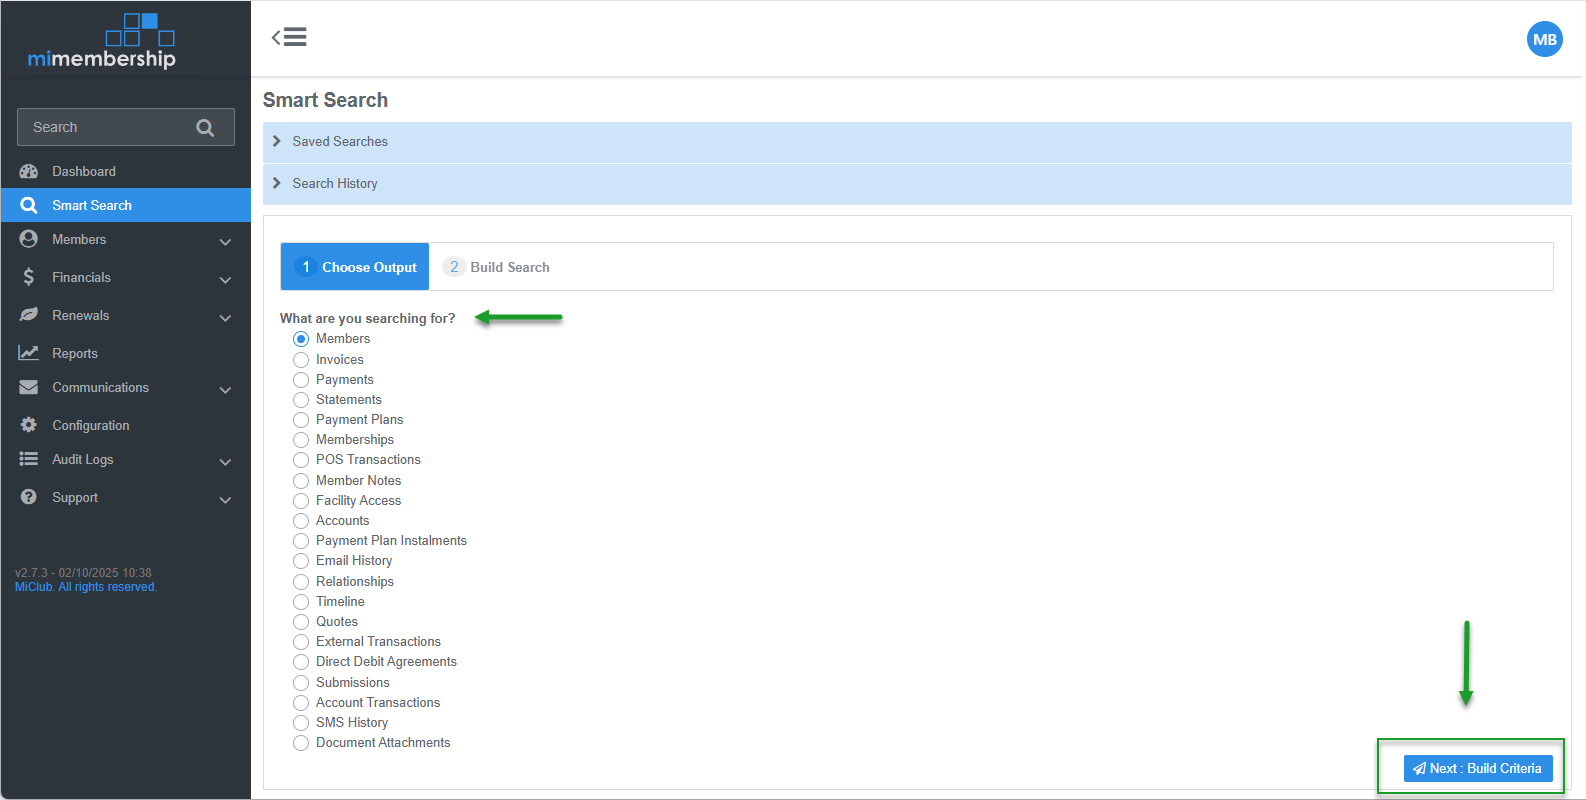
Step 1 - Open the Smart Search tool and select the output list
- Select Smart Search from main menu
- Choose the search Output from available options i.e. what do you want a list of (default is Members)
- Click the Next: Build Criteria button
Step 2 - Build the smart search criteria
- Select your search Criteria from each of the Search Field menu options:
- Field Section - the Data Type (specific area within the database from where the data is entered)
- Field Name - the Field Data available in the Data Type
- Field Operation - the Formula to apply to the Value
- Field Value - the Data entered in the Field Data
- Click the +Criteria button
- Repeat until all criteria options for the smart search have been added
- Note: each criteria added will be assumed to be "AND" unless "OR" is selected prior to adding the next set of criteria options and clicking the +Criteria button
- Click the Next: Preview Results button. This action returns a list with the smart search results

TIP: tick the Background check box to run the search as a background task. Click the Magnifying Glass icon in the search progress taskbar to open the smart search results.

Step 3 - Preview the smart search results and process an action
From the smart search results preview page you can perform a number of actions within the two main options:
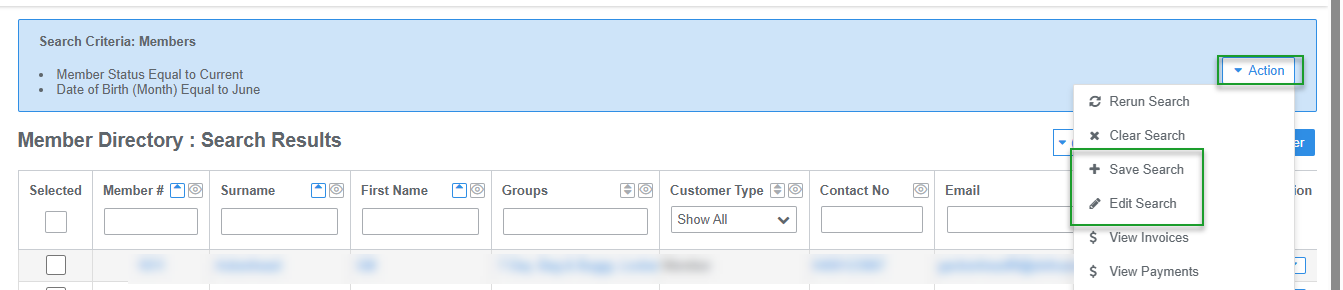
Option 1: use the Action button located in the Search Criteria Taskbar and select:
- Edit Search - to return to the Build Search tool and remove or add search criteria. To remove criteria click the X button in the Search Criteria space
- Save Search - enter a Name for the search and click the Save button. Saved searches can be run again without the need to enter the build search criteria again. Saved searches can be found under the Saved Searches Display menu located on the Smart Search home page
- Rerun Search - runs the search again using the same build search criteria
- Other options - these are available based on the chosen Output when building the search i.e. invoices or payments

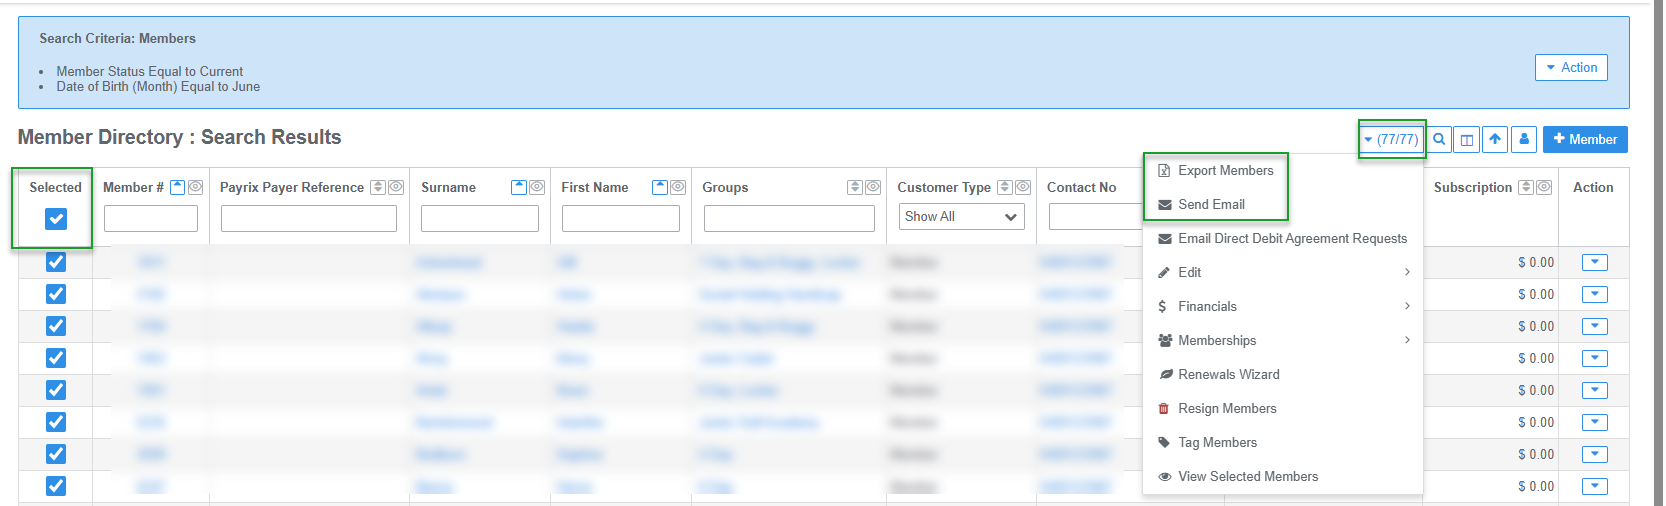
Option 2: Tick the Selected check box to select all results and use the Bulk Action button to:
- Export the search results to csv - this opens the Export window. Move the required field data from the left to right column and click the Export CSV button
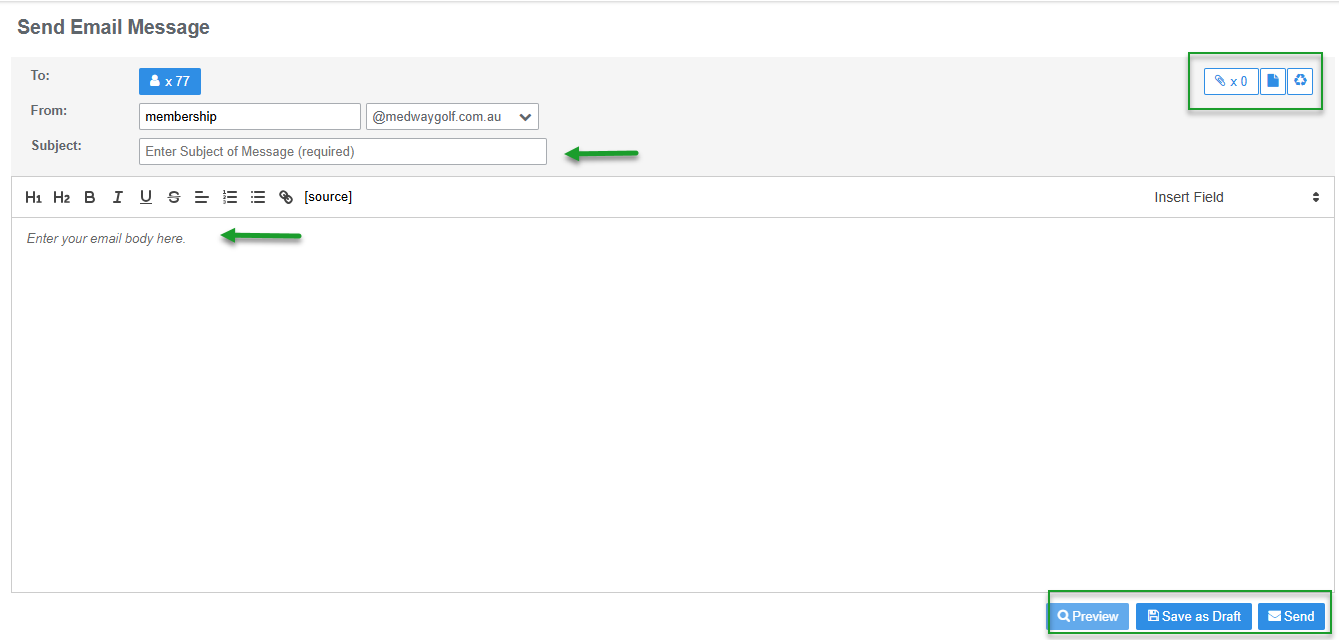
- Send Email - redirects you to the communications Send Ad-hoc Email page. Update the email fields and content, then click the Send button. See instructions on how to Send Ad-hoc Email >
- Other Options - select another one of the bulk action menu options. Options available will depend on the chosen Output when building the search

Was this article helpful?
That’s Great!
Thank you for your feedback
Sorry! We couldn't be helpful
Thank you for your feedback
Feedback sent
We appreciate your effort and will try to fix the article