The manual allocation process allows you to offset credit transactions against debit transactions within a member’s account.
This process can be used to allocate various transaction types, including Payments, Invoices, Credit Notes, POS transactions and Account Transfers.
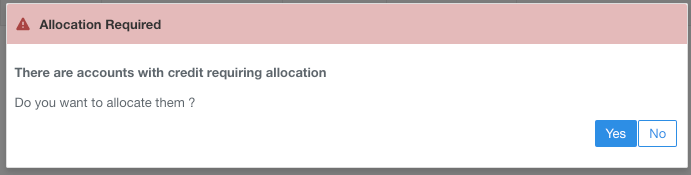
Important: When creating a new payment, MiMembership will display a warning if the member already has an unallocated credit in their account. You will be prompted to select Yes or No to determine whether you wish to proceed with the allocation.
Step 1 - Search for and select the account requiring allocation
There are two ways to access the allocation screen:
- From an individual member's account.
- From the Accounts repository, which allows you to view all member accounts with credits requiring allocation.
Option 1: Allocate from an individual member's account
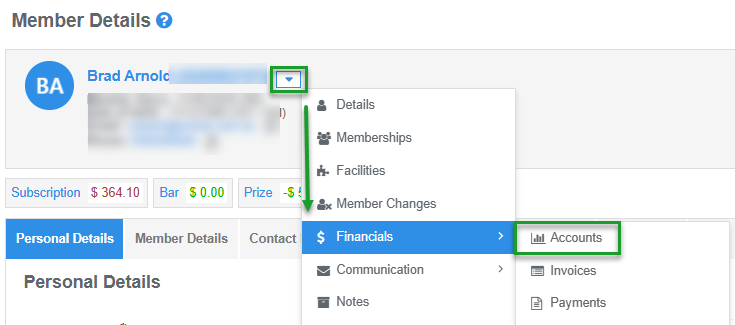
- From the Member Action menu, navigate to Financials > Accounts.
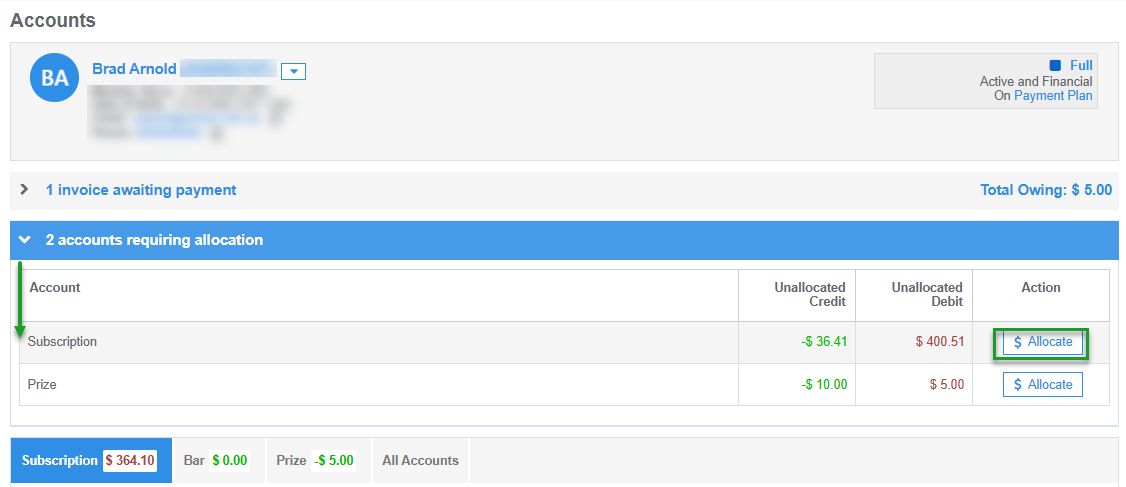
- Click the Accounts Requiring Allocation display bar to expand the section.
- Review the credits requiring allocation and click Allocate next to the relevant account.
You will be redirected to the allocation screen. Proceed to Step 2.
Option 2: Allocate from the Accounts repository
- From the Main Menu, navigate to Financials > Accounts.
- Select the relevant Account tab.
- Locate the Requires Allocation column and apply the filter Yes to display accounts with unallocated credits. Note: If the Requires Allocation column is not visible, you may need to enable it through the Display Columns menu.
- From the relevant member account's Account Action menu, select Allocation of Credit.
You will be redirected to the allocation screen. Proceed to Step 2.


Step 2 - Update the allocation settings and save
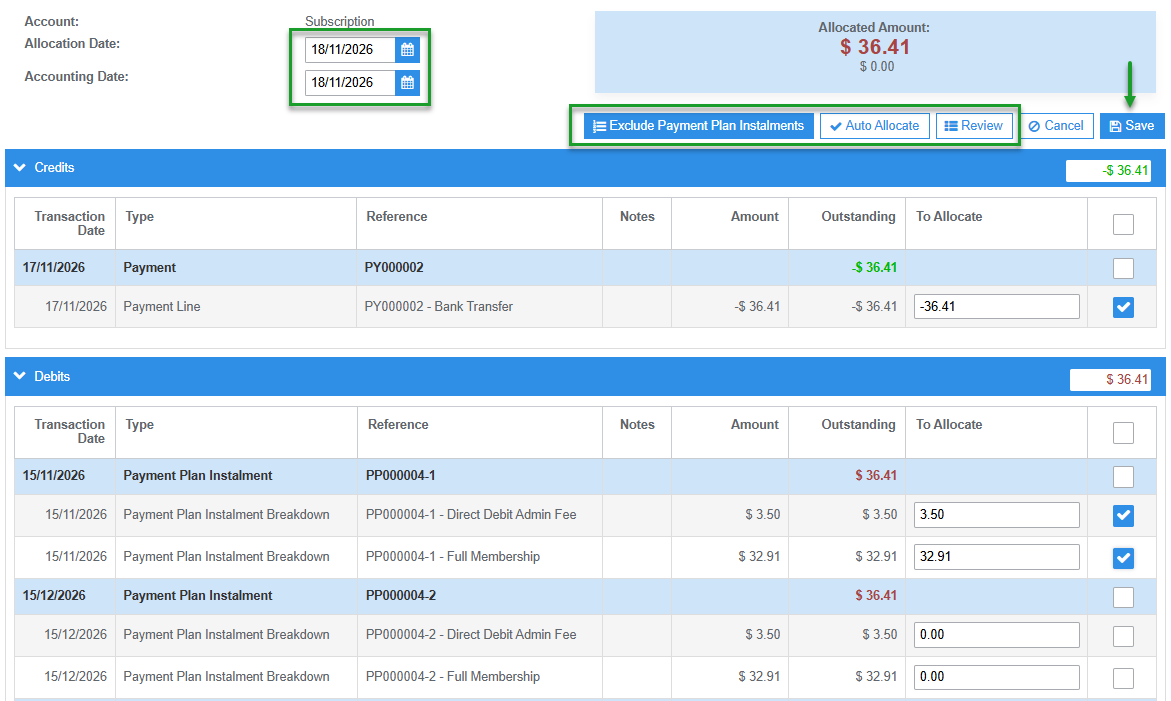
By default, the allocation screen displays all available credits and debits, excluding payment plan instalments.
To include payment plan instalments in the allocation process, click Include Payment Plan Instalments.
Follow the steps below to complete the allocation:
1. Set the allocation dates
- Enter the Allocation Date and Accounting Date.
- Both dates default to today's date but can be amended if required.
2. Allocate the credits and debits.
There are to ways to complete the allocation:
Option A - Auto Allocate
Click Auto Allocate to have MiMembership automatically allocate the oldest credits against the oldest debits.
Option B – Manual Allocation
Manually select the credits and debits you wish to offset:
- Credits Panel: Tick the checkbox next to each credit transaction you wish to allocate, or enter a specific amount in the To Allocate field.
- Debits Panel: Tick the checkbox next to each debit transaction you wish to allocate, or enter a specific amount in the To Allocate field.
3. Review the allocations (optional)
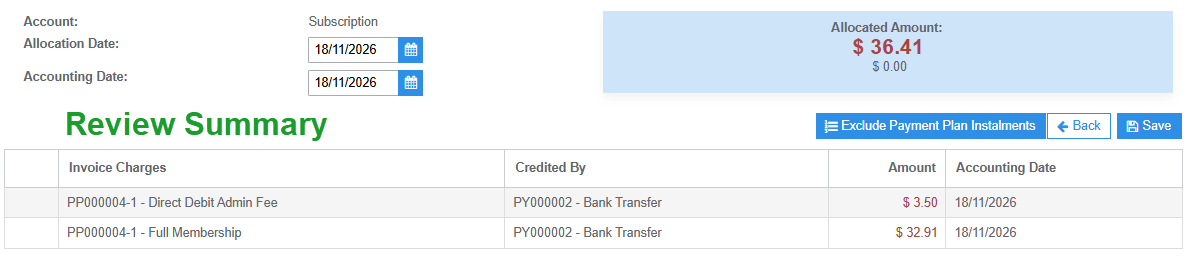
Click Review to open a summary of the selected credits and debits. Check that the allocations are correct before proceeding.
You can also save the allocations directly from the Review screen.
4. Save the allocations
Once you are satisfied with the allocations, click Save to complete the process.
Was this article helpful?
That’s Great!
Thank you for your feedback
Sorry! We couldn't be helpful
Thank you for your feedback
Feedback sent
We appreciate your effort and will try to fix the article