When Should You Complete This Process?
Complete this process if payment plans were not created during the Renewal Wizard, or if any membership renewal invoices contain negative charges.
Important: The Renewal Wizard cannot create payment plans for invoices that contain negative charges. If this occurs, the following message will appear under the Preview Payment Plans tab:
“One or more invoices has a negative charge. You will need to finalise create of the invoices first and then create the payment plans after the renewal process is complete...”
In this situation, you must complete the renewal process and finalise the invoices before creating the payment plans manually by following the steps below.
Step 1 – Open the Renewal Batch
Navigate to Renewals > History and locate the relevant renewal batch.
Step 2 – Open the Invoice Repository
Open the invoice repository for the batch by either:
- Clicking on the number of invoices button; or
- Selecting the relevant option in the Action menu.

Step 3 – Display the Payment Plan Column
Ensure that the Payment Plan column is visible in the invoice repository.
Use the Show/Hide Action to show the Payment Plan column.
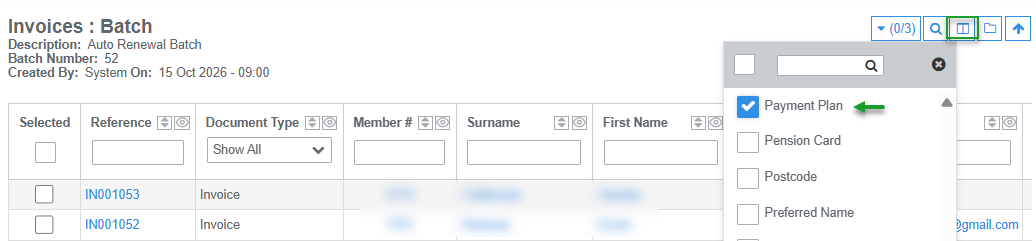
Step 4 – Filter Invoices by Payment Plan Template
Filter the Payment Plan column to identify invoices for members who have a payment plan template assigned to their profile.
You can do this in either of the following ways:
- Select Show Not Empty to display invoices with a payment plan template assigned.
- Enter the name of a specific payment plan template in the column search field to filter by that template.
Note: If you use multiple payment plan templates, filter by the specific template you want to process to ensure the correct invoices are selected.
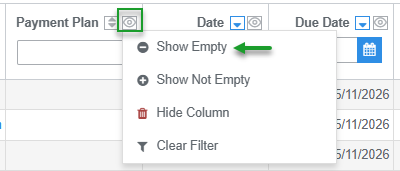 | 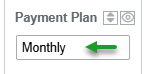 |
Step 5 – Select Invoices and Add to Payment Plan
- Select Select All to select the filtered invoices.
- Open the Bulk Action drop-down menu.
- Select Add to Payment Plan.
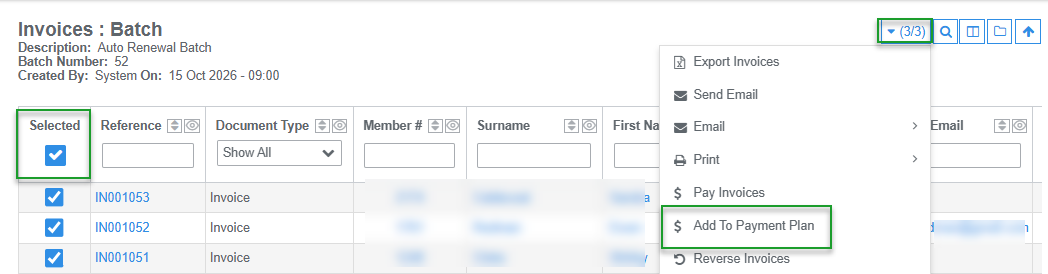
Step 6 – Configure and Create Payment Plans
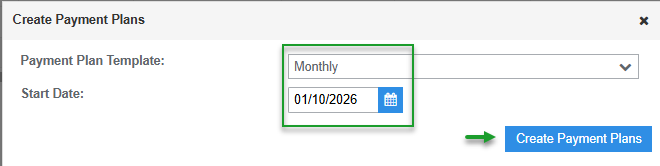
- Select the payment plan template you want to use.
- Enter the Start Date for the payment plans.
- Review your selections to ensure the correct template and start date have been applied.
- Select Create Payment Plans.
Note: If you offer multiple payment plan templates, repeat Steps 5 and 6 for each template. Filter the invoices by the relevant payment plan template before selecting the invoices and creating the payment plans.
Step 7 – Review the Payment Plan Batch
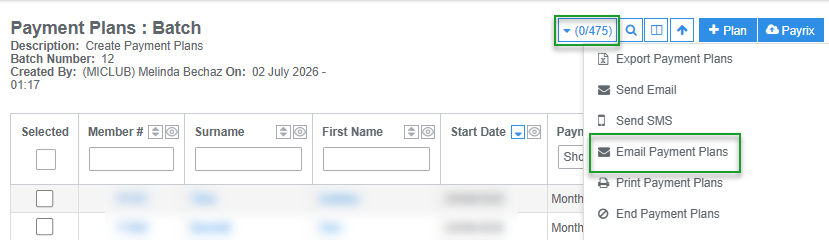
The payment plans will be created in a new batch.
Navigate to Audit Logs > Batch History to locate the batch and review the payment plans created. You can then perform the required actions from the batch as needed. For example, email the payment plans.

Was this article helpful?
That’s Great!
Thank you for your feedback
Sorry! We couldn't be helpful
Thank you for your feedback
Feedback sent
We appreciate your effort and will try to fix the article