To reverse defaulted invoices and resign unfinancial members using the bulk actions each of the Steps outlined below are to be completed in order.
| TIP The bulk action process steps will create the following batches: Mark as Document Not Required, Cancel Memberships and Resign members. To return to any one of the batches created during the bulk invoice reversal and resignation processes, navigate the main menu to Audit Logs > Batch History. |
Step by Step Guide
Step 1 - Clear Invoice Required tab in Memberships Repository
Memberships listed in the Invoice Required tab must be invoiced or have the document status changed to ‘invoice not required’ before proceeding.
- Navigate the main menu to Members and then Memberships
- Click on the Invoice Required tab
- to create an invoice click on the document status Invoice Required link
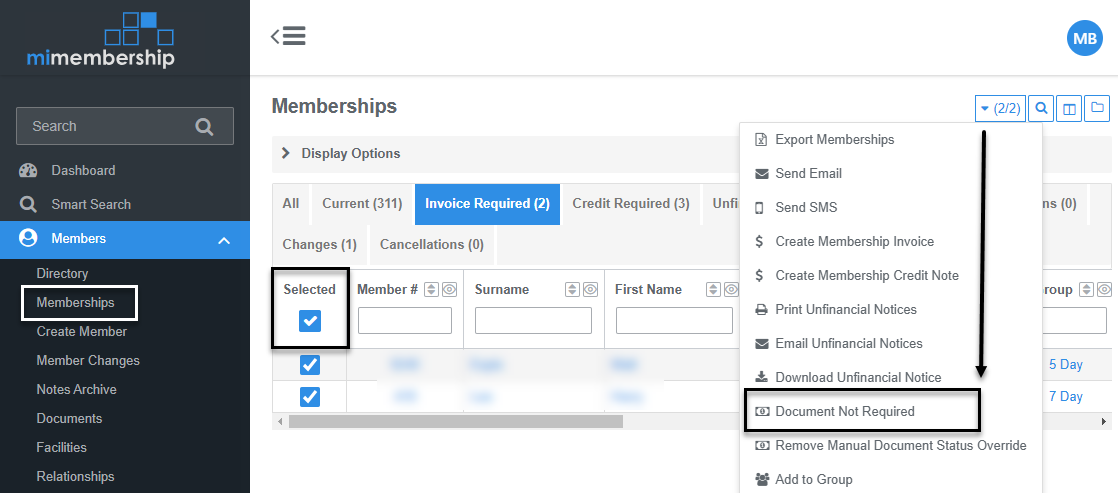
- Tick the Selected check box to select All memberships
- Click on the Bulk Action Menu button
- Select Document Not Required option from the drop menu. A task progress bar will appear as the process runs to change the document status (this action creates a batch)
Step 2 - Reverse Defaulted Invoices
Reverse the defaulted membership invoices.
Notes:
- Where there are defaulted invoices with different accounting dates; depending on the required accounting reversal date you may need to reverse these invoices manually or in separate bulk batches.
- Defaulted invoices that have partial payments allocated can only be cleared by creating a manual credit note and must be resigned manually and excluded from the bulk actions i.e. invoices that were on a payment plan
- Navigate the main menu to Financials and then Invoices
- Click on the Defaulted Tab
- Tick the Selected check box to select All invoices (or batch defaulted invoices by accounting date)
- Click on the Bulk Action menu button
- Select Reverse Invoices option from the drop menu
- Enter a Reversal Date
- Enter a Reversal Accounting Date
- (Optional) add any required notes in Reason text box
- Click Reverse Invoice button (this action creates a batch)
- Repeat steps 1-9 if reversing invoices in batches

Step 3 – Change defaulted memberships Invoice Status to Document Not Required
After reversing the defaulted invoices, the members will appear under the Invoice Required tab in the Memberships Repository. Change the invoice status to 'invoice not required'
- Navigate the main menu to Members and then Memberships
- Click on the Invoice Required tab
- Tick the Selected check box to select All memberships
- Click on Bulk Action menu button
- Select Document Not Required option from the drop menu
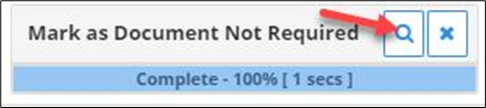
- The ‘Mark as Document Not Required’ task progress bar will appear at the top right of screen as the process to change the document status runs – wait for this to complete
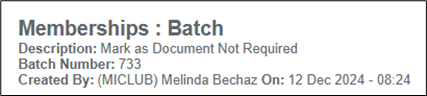
- Click the Magnifying Glass icon in the Mark as Document Not Required task bar when complete, per image below – this will redirect you to the Memberships: Batch

Step 4 - End Memberships
In the Memberships: Batch screen you can end the members' memberships in bulk.
Note: for members who have a discount group, as well as a membership group, you must end both groups for each member manually.
- Click on the Show/Hide Columns icon and tick the Groups box. This action adds the membership Groups column to the batch table
- Tick the Selected check box to select All members
- Scroll through the list and untick members who have multiple membership groups
- Click on the Bulk Action Menu button
- Select the End Memberships option from the drop menu
- Enter the Effective Date - see Tip below
- Click on Continue; you will be redirected to the Memberships: Cancelled Batch
| TIP To exclude these memberships from the current membership year's statistics, set the Effective Date (End Date) to the last day of the previous membership year. It is then important the resignation date in Step 5. 11. below, is set to the first day of the current membership year. |

Step 5 - Resign Members
From the Memberships: Cancelled Batch screen you can bulk resign the members by completing these steps.
Note: we recommend member account balances are cleared (balance = $0.00) before they are resigned
- Tick the Selected check box to select All members to resign. Untick any members to exclude from the resignation process
- Click on the Bulk Action Menu button
- Select the View Associated Members option from the drop menu
- Click on the Show/Hide Columns icon and tick each of your member accounts boxes i.e. House, Subscription, Prize. This action adds the member Accounts columns to the batch table
- Tick the Selected check box to select All members. Only member's with $0.00 account balances should be selected. Scroll through the list and Untick any member's that have a value in the account balances - complete the individual Resign a Member > for these records
- Click on the Bulk Action Menu button
- Select Resign Members option from the drop menu
- Click Yes in Resignation Confirmation box
- Select the Resignation Reason
- (Optional) add any notes in Explanation text box
- Select the resignation Effective Date - this is generally the day after the membership end date entered in Step 4.6
- Click the Save Reason button
- The ‘Resign Members’ task progress bar will appear at the top right of screen as the process to bulk resign the members runs – wait for this to complete
- Click the Magnifying Glass icon in ‘Resign Members’ task when complete to view the the Resign Members: Batch


Was this article helpful?
That’s Great!
Thank you for your feedback
Sorry! We couldn't be helpful
Thank you for your feedback
Feedback sent
We appreciate your effort and will try to fix the article