Send an email message to individually selected members. During this process you can:
- Add attachments (5MB maximum)
- Reuse content from a previous message. Handy when you need to send the same message to additional recipients or if you send the same message on a regular basis and the content does not vary.
Step by Step Guide
Option 1: Select Members Individually
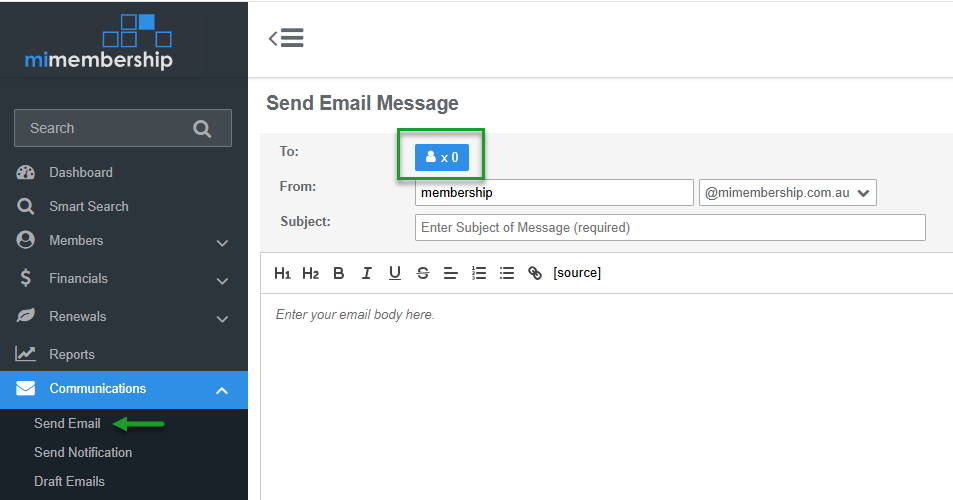
Step 1 - Open the Ad-hoc send message tool and add member/s (recipient/s)
- From the main menu select Communications and Send Message
- Click the add Member x 0 button. This action will open the Add Member dialog box
- Type the member name or member number in the Select Member field
- Repeat to add multiple members to the same email message
- Expand the Members to receive email display to view selected members - click the Bin icon to delete any members from the recipient list
- Click the X to Close the window and continue

Step 2 - Enter email content, add attachments and set email template
- Enter the From email address and select the club Domain from the drop menu
- Enter an email Subject. This is the subject the recipient will see in their email inbox
- (Optional) to add external attachments click the Attach button. This will open the attachments dialog
- Select Choose to open your File Explorer. Repeat to add multiple attachments
- Click the X to Close the window and continue
- Set the email template. Complete one of the following options:
- Add an Ad-hoc Email Template - click the Add Template button. Select the required Ad-hoc template from the menu options. Click the Update button to apply the template. Click the X to Close the window and continue
- To reuse Previous Content - click the Previous Content button. Select the required previous content from the menu options. Click the Update button. Click the X to Close the window and continue
- Type the email Body content
- If reusing previous content you can Edit the body content
- Use the Insert Field options to auto populate key information
 Buttons L-R: Add Attachment, Add Ad-hoc Email Template and Add Previous Content
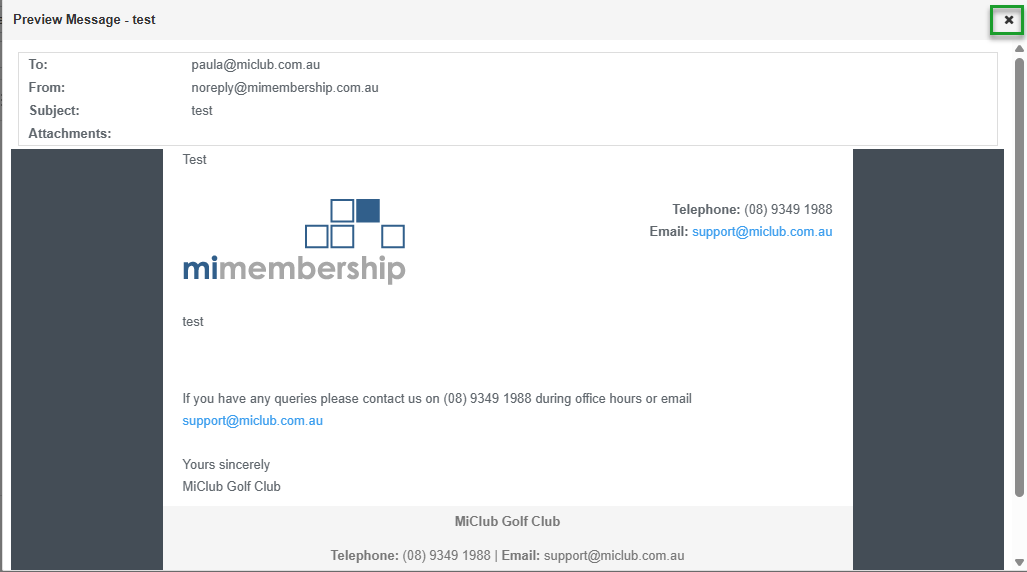
Step 3 - Preview the email and save as draft or send
- Click the Preview button. This opens a preview of the email that includes the template header and footer and any populated field data inserted in the body of the email
- Click the X to close the preview window and continue
- (Optional) click the Save as Draft button. This will save the email with selected members, attachments and content
- To return to draft emails select Communications from the main menu and Draft Emails. Click on the draft Subject link to open to continue to Edit or Send the email
- Click the Send button. Sent emails appear in the Email History located under main menu Communications and in the individual member record history. Past messages can be also be found in Communications

Was this article helpful?
That’s Great!
Thank you for your feedback
Sorry! We couldn't be helpful
Thank you for your feedback
Feedback sent
We appreciate your effort and will try to fix the article