Complete this process to:
- add a member to your chosen payment gateway provider account portal (required to process direct debit payments) or update member credit card or bank account details
- add an existing invoice to a direct debit payment plan instalment schedule
- email the online direct debit agreement to the member
Step by Step Guide
Step 1 - Add member to the payment gateway provider account portal
- Use the Quick Search to navigate to the member record
- Click the Financial Details tab, then Edit button
- Click on the + button located next to the Payment Gateway Reference Number or ID field. This action populates the reference number field with a unique ID number from the payment gateway provider
- Click on the $ button located next to the Payment Gateway Reference Number or ID field. This action will open an entry portal window to your payment gateway provider
- Enter the bank or credit card details provided by the member. Select the Update button and close the window. This action can also be completed to update the member's existing credit card or bank details
- Select the member's preferred Payment Plan Template from the menu options. This step MUST be completed for members who have requested their payment plan to be ongoing.
- Click the Save button
Note: Personal credit card and bank details are not maintained in MiMembership. These are sent through the secure portal to your chosen payment gateway provider. We recommend you destroy any hard copy documents or notes that include personal member details.


Step 2- Add an invoice to the Payment Plan
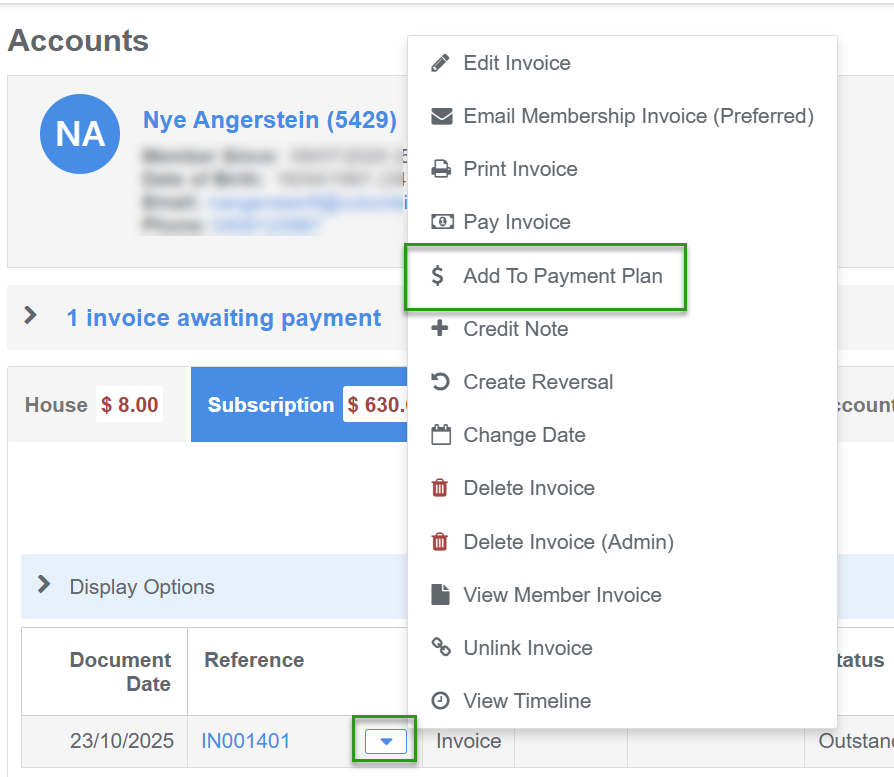
- Navigate to the member's account invoices by either clicking the Account tab or selecting Accounts from the Member Action drop menu
- Click the Invoice action button located next to the invoice reference number
- Select the $ Add To Payment Plan option
- Move the invoice / invoices from left to right to add then to a payment plan. You can drag/drop the invoices or use the arrow buttons.
- Select Next


Step 3 - Apply the payment plan template to the invoice and save the plan
- Select the payment plan template from the drop menu and click the Apply Template button. This will apply the pre-configured payment plan settings to the plan i.e. if there are direct debit fees or set charges added to selected instalments.
- Edit the Start and End dates (optional). Generally this is not required if the Apply Template button has been clicked.
- Click the Next button
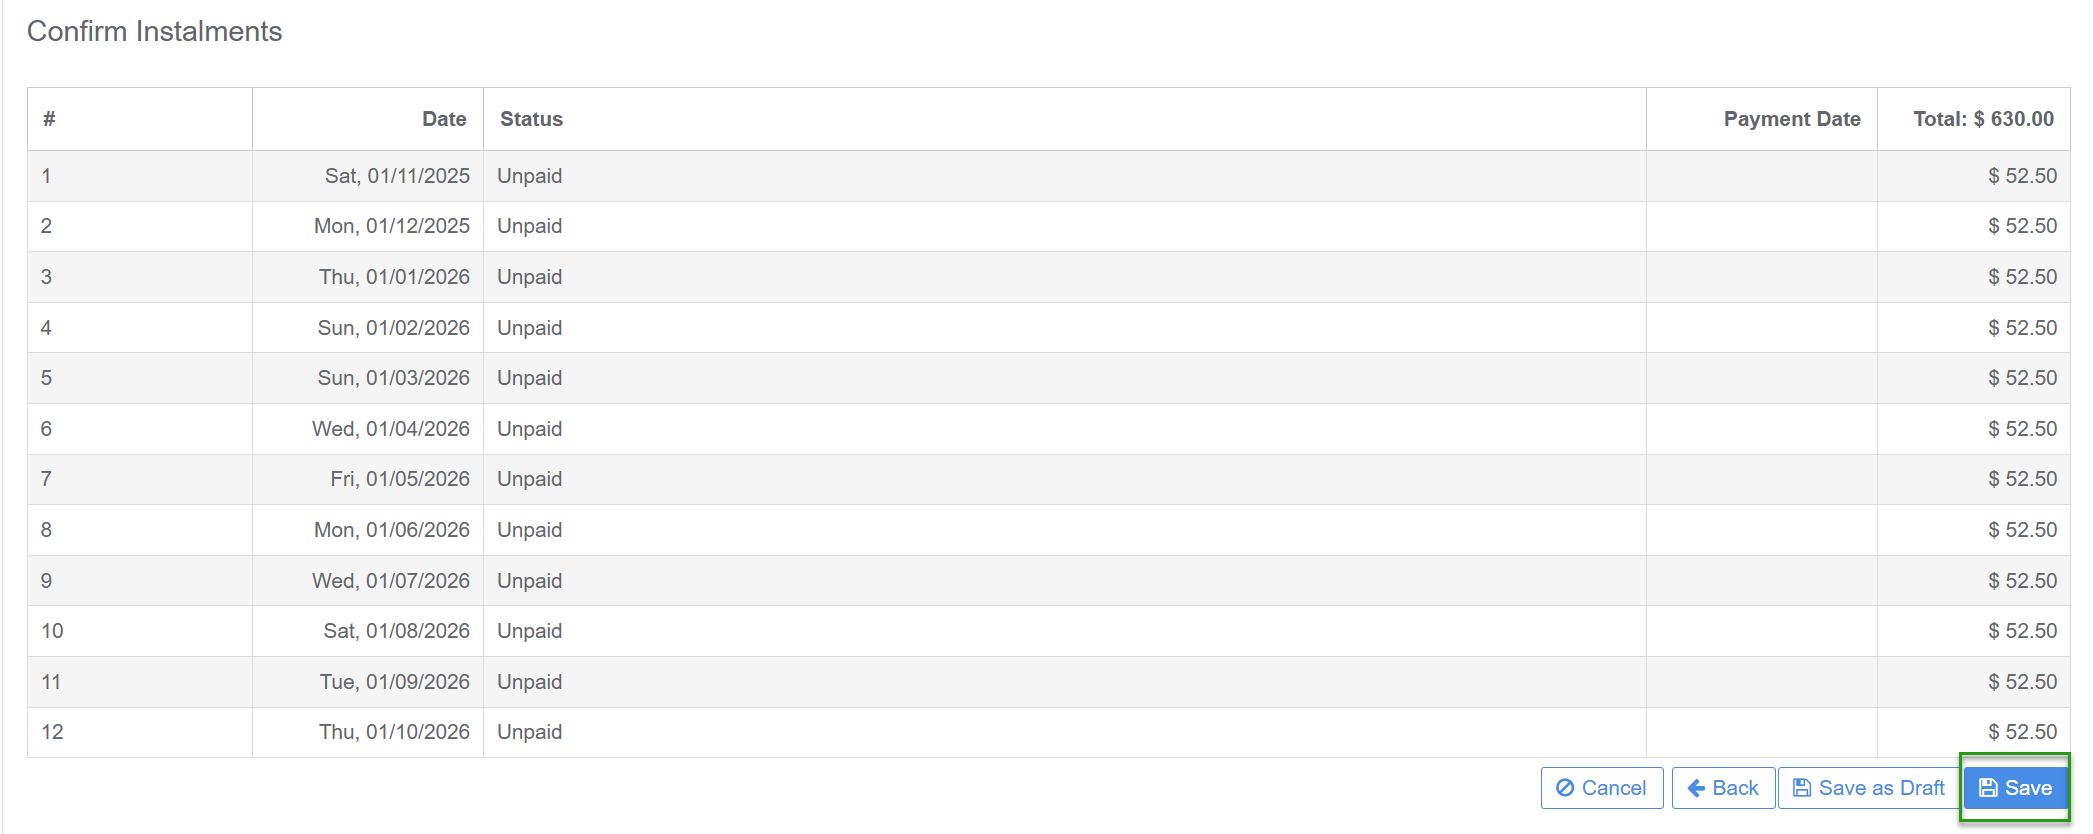
- Check the configuration of the instalments and make any edits to the instalment dates or amounts. View the instalment breakdown by ticking the Show Instalment Breakdown check box
- Once reviewed, select Next
- Select Save. The plan is created and the invoice and membership status will have updated to show On Payment Plan


Step 4 - Email the member their Direct Debit agreement.
- Navigate to the member's Financials and Direct Debit Agreements from the Member Action menu.
- Click on the Direct Debit Request button located top right of screen.


Was this article helpful?
That’s Great!
Thank you for your feedback
Sorry! We couldn't be helpful
Thank you for your feedback
Feedback sent
We appreciate your effort and will try to fix the article