Relationships are used to link individual member records to each other to identify members of the same family or corporate entity. Additional relationship groups and types can be created to identify other relationship or linked member information. In this example a new relationship for Sponsorships is created.
Click here to view the steps on how to Add Relationship links to member records
Step by Step
Step 1 - Create the new Relationship Group
- Navigate to Configuration and select Relationship Groups (located under the Members section)
- Select the +Relationship Group button (located top right of screen)
- Enter the new Relationship Group Name, select Save
The Relationship Group name will be visible for selection in the member record when adding relationship links


Step 2 - Create the Relationship Types for the new Relationship Group
A minimum of two relationship types is required
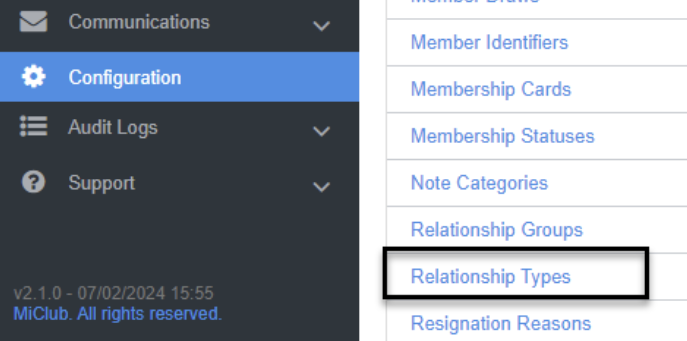
- Navigate back to Configuration and select Relationship Types (located under the Members section)
- Select the +Relationship Type button
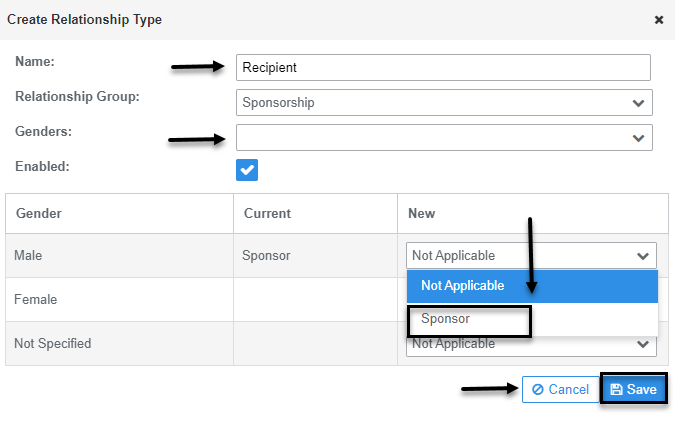
- Enter the Name for the first link of the Relationship Type
- Set the Relationship Group field to the group created in Step 1
- Select the Genders from the drop menu
- Click the Save button (this will redirect back to the Manage Relationship Type page in Configuration)
- Select the +Relationship Type button
- Enter the Name for the second link of the Relationship Type
- Set the Relationship Group field to the group created in Step 1
- Select the Genders from the drop menu
- Click the Save button (this will redirect back to the Manage Relationship Type page in Configuration)
- Repeat to create more Relationship Type links (if required)


Step 3 - Apply the Gender to the Relationship Type
- Navigate back to Configuration and select Relationship Types (located under the Members section)
- From the list of Relationship Types, click on the first link Name of the Relationship Type created in Step 2, or select Edit from the Action drop menu
- From the New drop menu for each Gender, select the second link Name of the Relationship Type
- Click the Save button
- Repeat for each Relationship Type created in Step 2


Was this article helpful?
That’s Great!
Thank you for your feedback
Sorry! We couldn't be helpful
Thank you for your feedback
Feedback sent
We appreciate your effort and will try to fix the article