Tags can be used to identify and communicate to different groups of members within the MiMembership database. Use the Smart Search feature to search for members with select tags.
Manage Tags in Configuration to add or delete members from existing tags, edit tag labels or delete tags.
The tag is visible on the member record details page, located under the Notes section, and will also appear in the MiClub Golf member record (when integration is enabled). Tag history is recorded in the member's timeline.
Create a New Tag
There are two options to create a new tag:
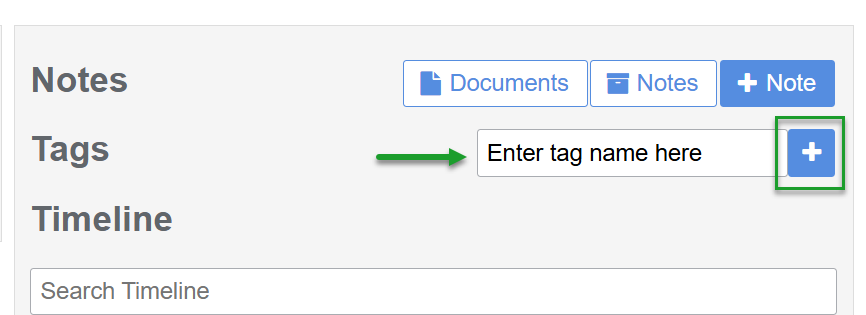
Option 1 - From the Individual Member Record
- Use the Quick Search or Members Directory to navigate to the individual member record
- Locate the Tag field (between the Notes section and member Timeline)
- Type in a new Tag name (label) in the Tag field and click the + button. This adds the new tag to the member record and populates the Tag drop menu
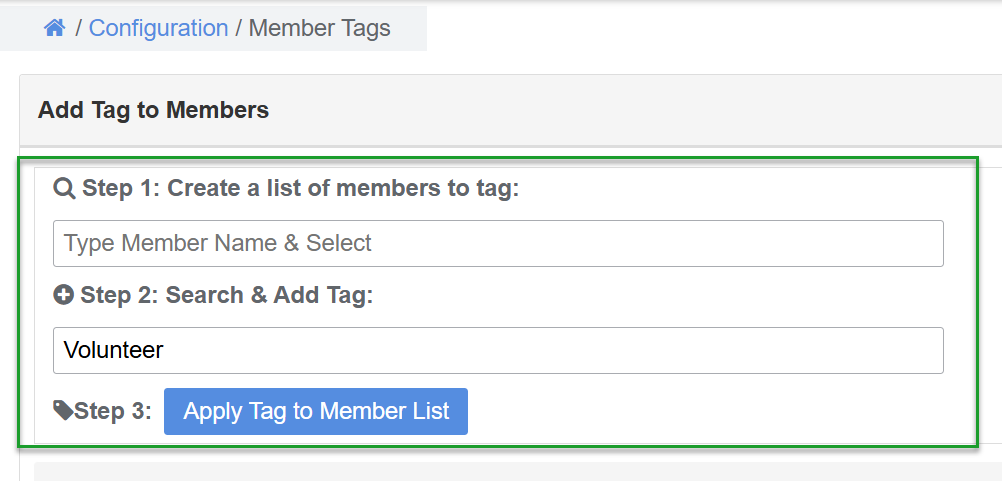
Option 2 - From Configuration
This option is best used to add multiple members to the same tag
- Navigate the main menu to Configuration and click Tags, located under the Members heading
- Complete Steps 1 and 2:
- Step 1 Create a list: Enter the Member Number or Member Name and Select from the member drop menu. Repeat to create a list of multiple members to tag. The selected members will appear in the Member List below the Search & Tag field
- Step 2 Search & Add Tag: Enter the Name of the new tag label
- Click the Apply Tag to Member List button. This action creates a list of members assigned to the new tag under the Manage Existing Tag menu, which can be edited to rename the tag label or remove members from the tag

Manage Tags
Add members to an existing tag, remove members from an existing tag, edit or delete a tag
To manage tags navigate the main menu to Configuration and click Tags, located under the Members heading and action any of the following options:
Add a Member to Existing Tag
- Complete Steps 1 and 2:
- Step 1 Create a list: Enter the Member Number or Member Name and Select from the member drop menu. Repeat to add multiple members to the tag
- Step 2 Search & Add Tag: Start entering the Tag name and Select from the tag drop menu
- Click the Apply Tag to Member List button. This action adds the members to the selected tag label
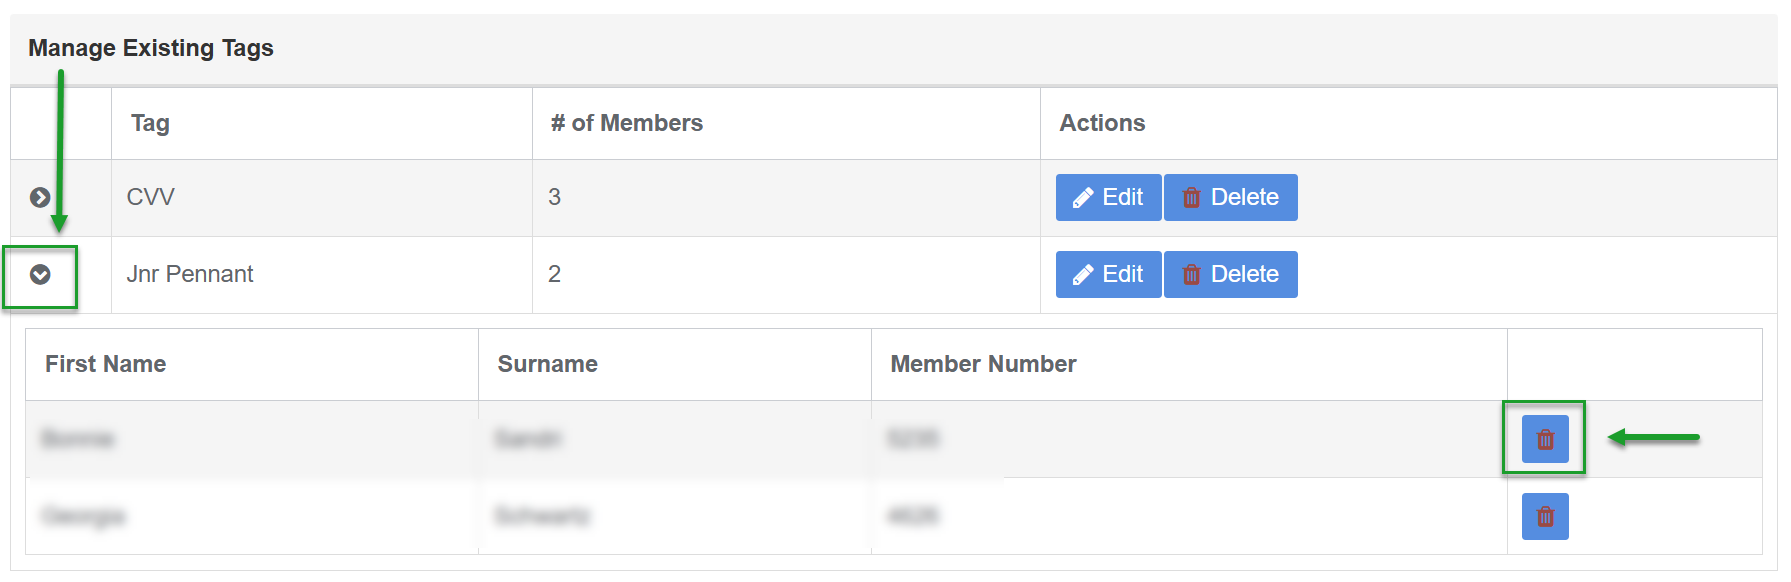
Remove a Member from Existing Tag
- Under the Manage Existing Tags display click the Display Arrow next to the Tag to view the list of members assigned to the tag
- Click the Delete (bin) icon next to the member name
Tip: you can remove a tag from the individual member record by clicking the X on the tag label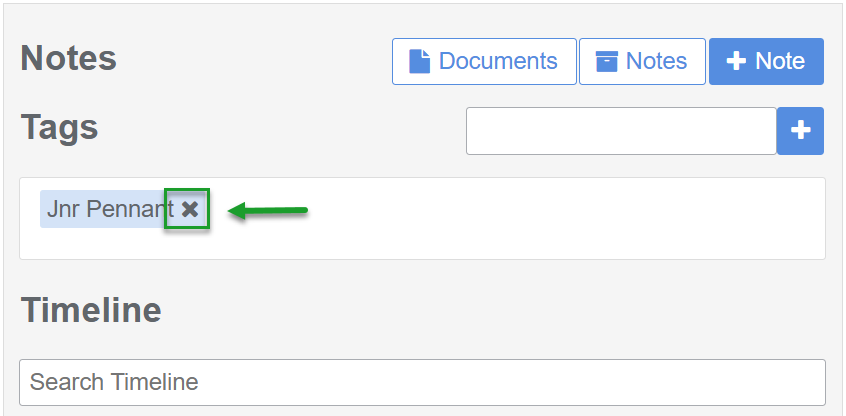
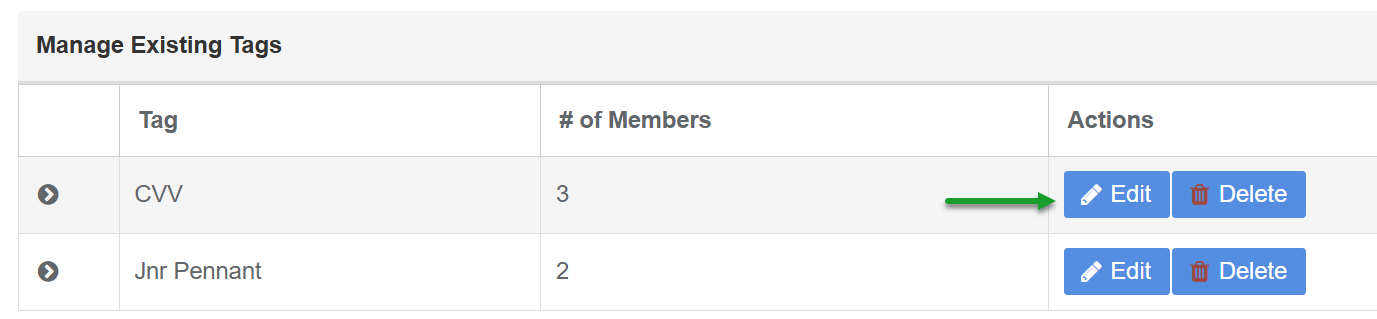
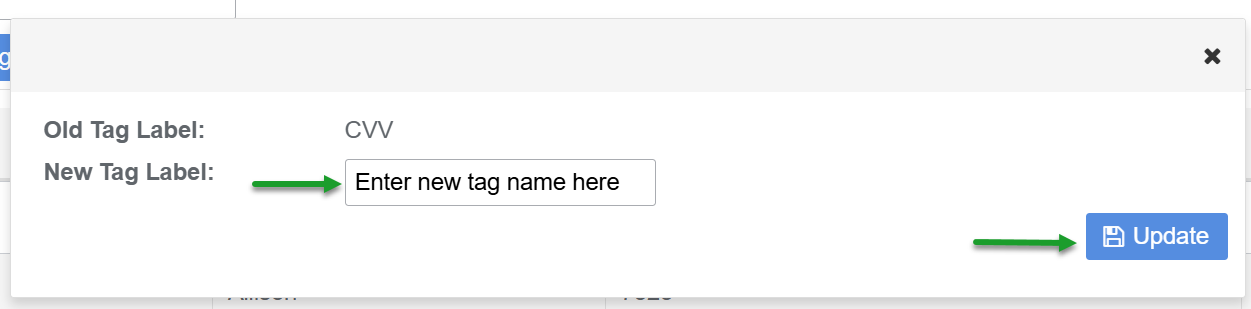
Edit (rename) a Tag Label
- Under the Manage Existing Tags display click the Edit button for the tag to edit
- Enter a New Tag label name
- Click the Update button
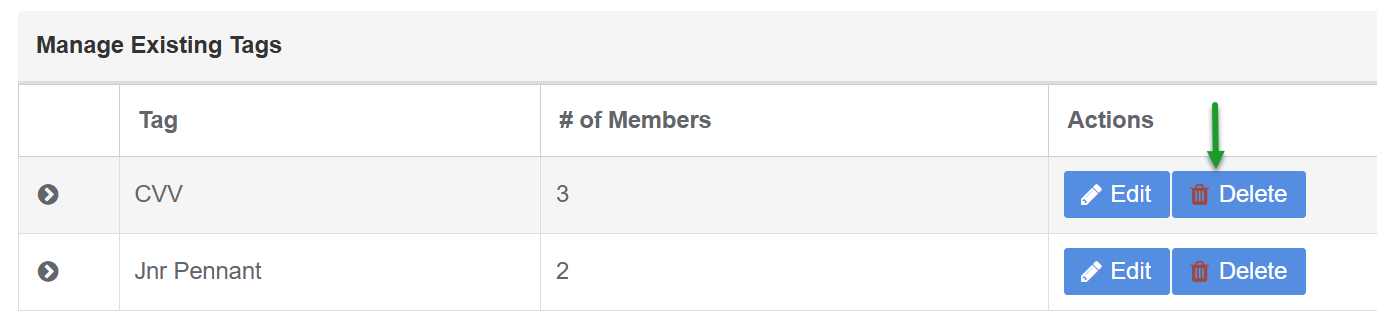
Delete a Tag Label
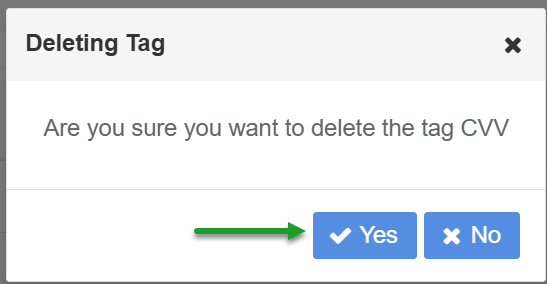
- Under the Manage Existing Tags display click the Delete button for the tag
- Click Yes to confirm in the Deleting Tag window - this action deletes the Tag and removes the Tab Label from the members record
Was this article helpful?
That’s Great!
Thank you for your feedback
Sorry! We couldn't be helpful
Thank you for your feedback
Feedback sent
We appreciate your effort and will try to fix the article